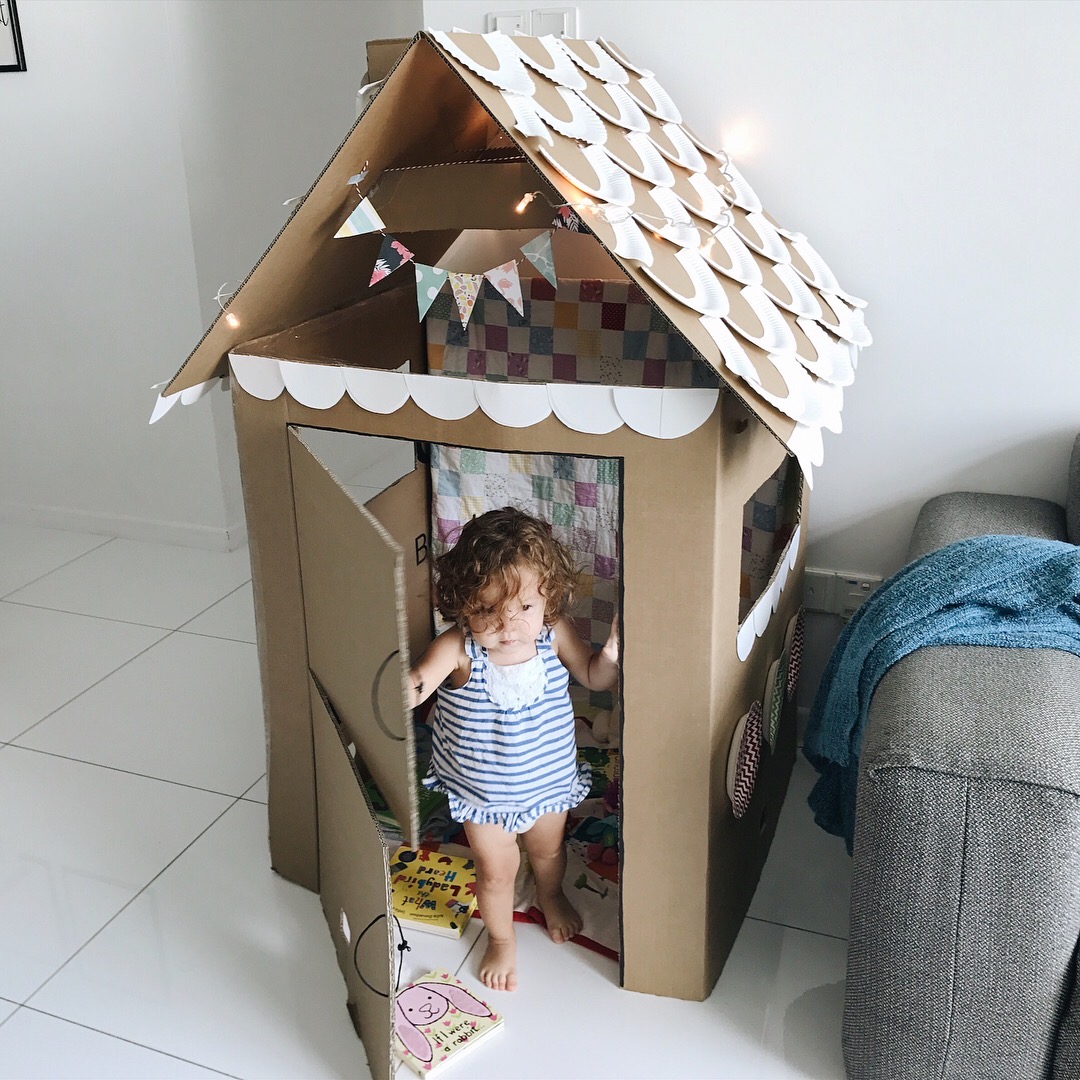
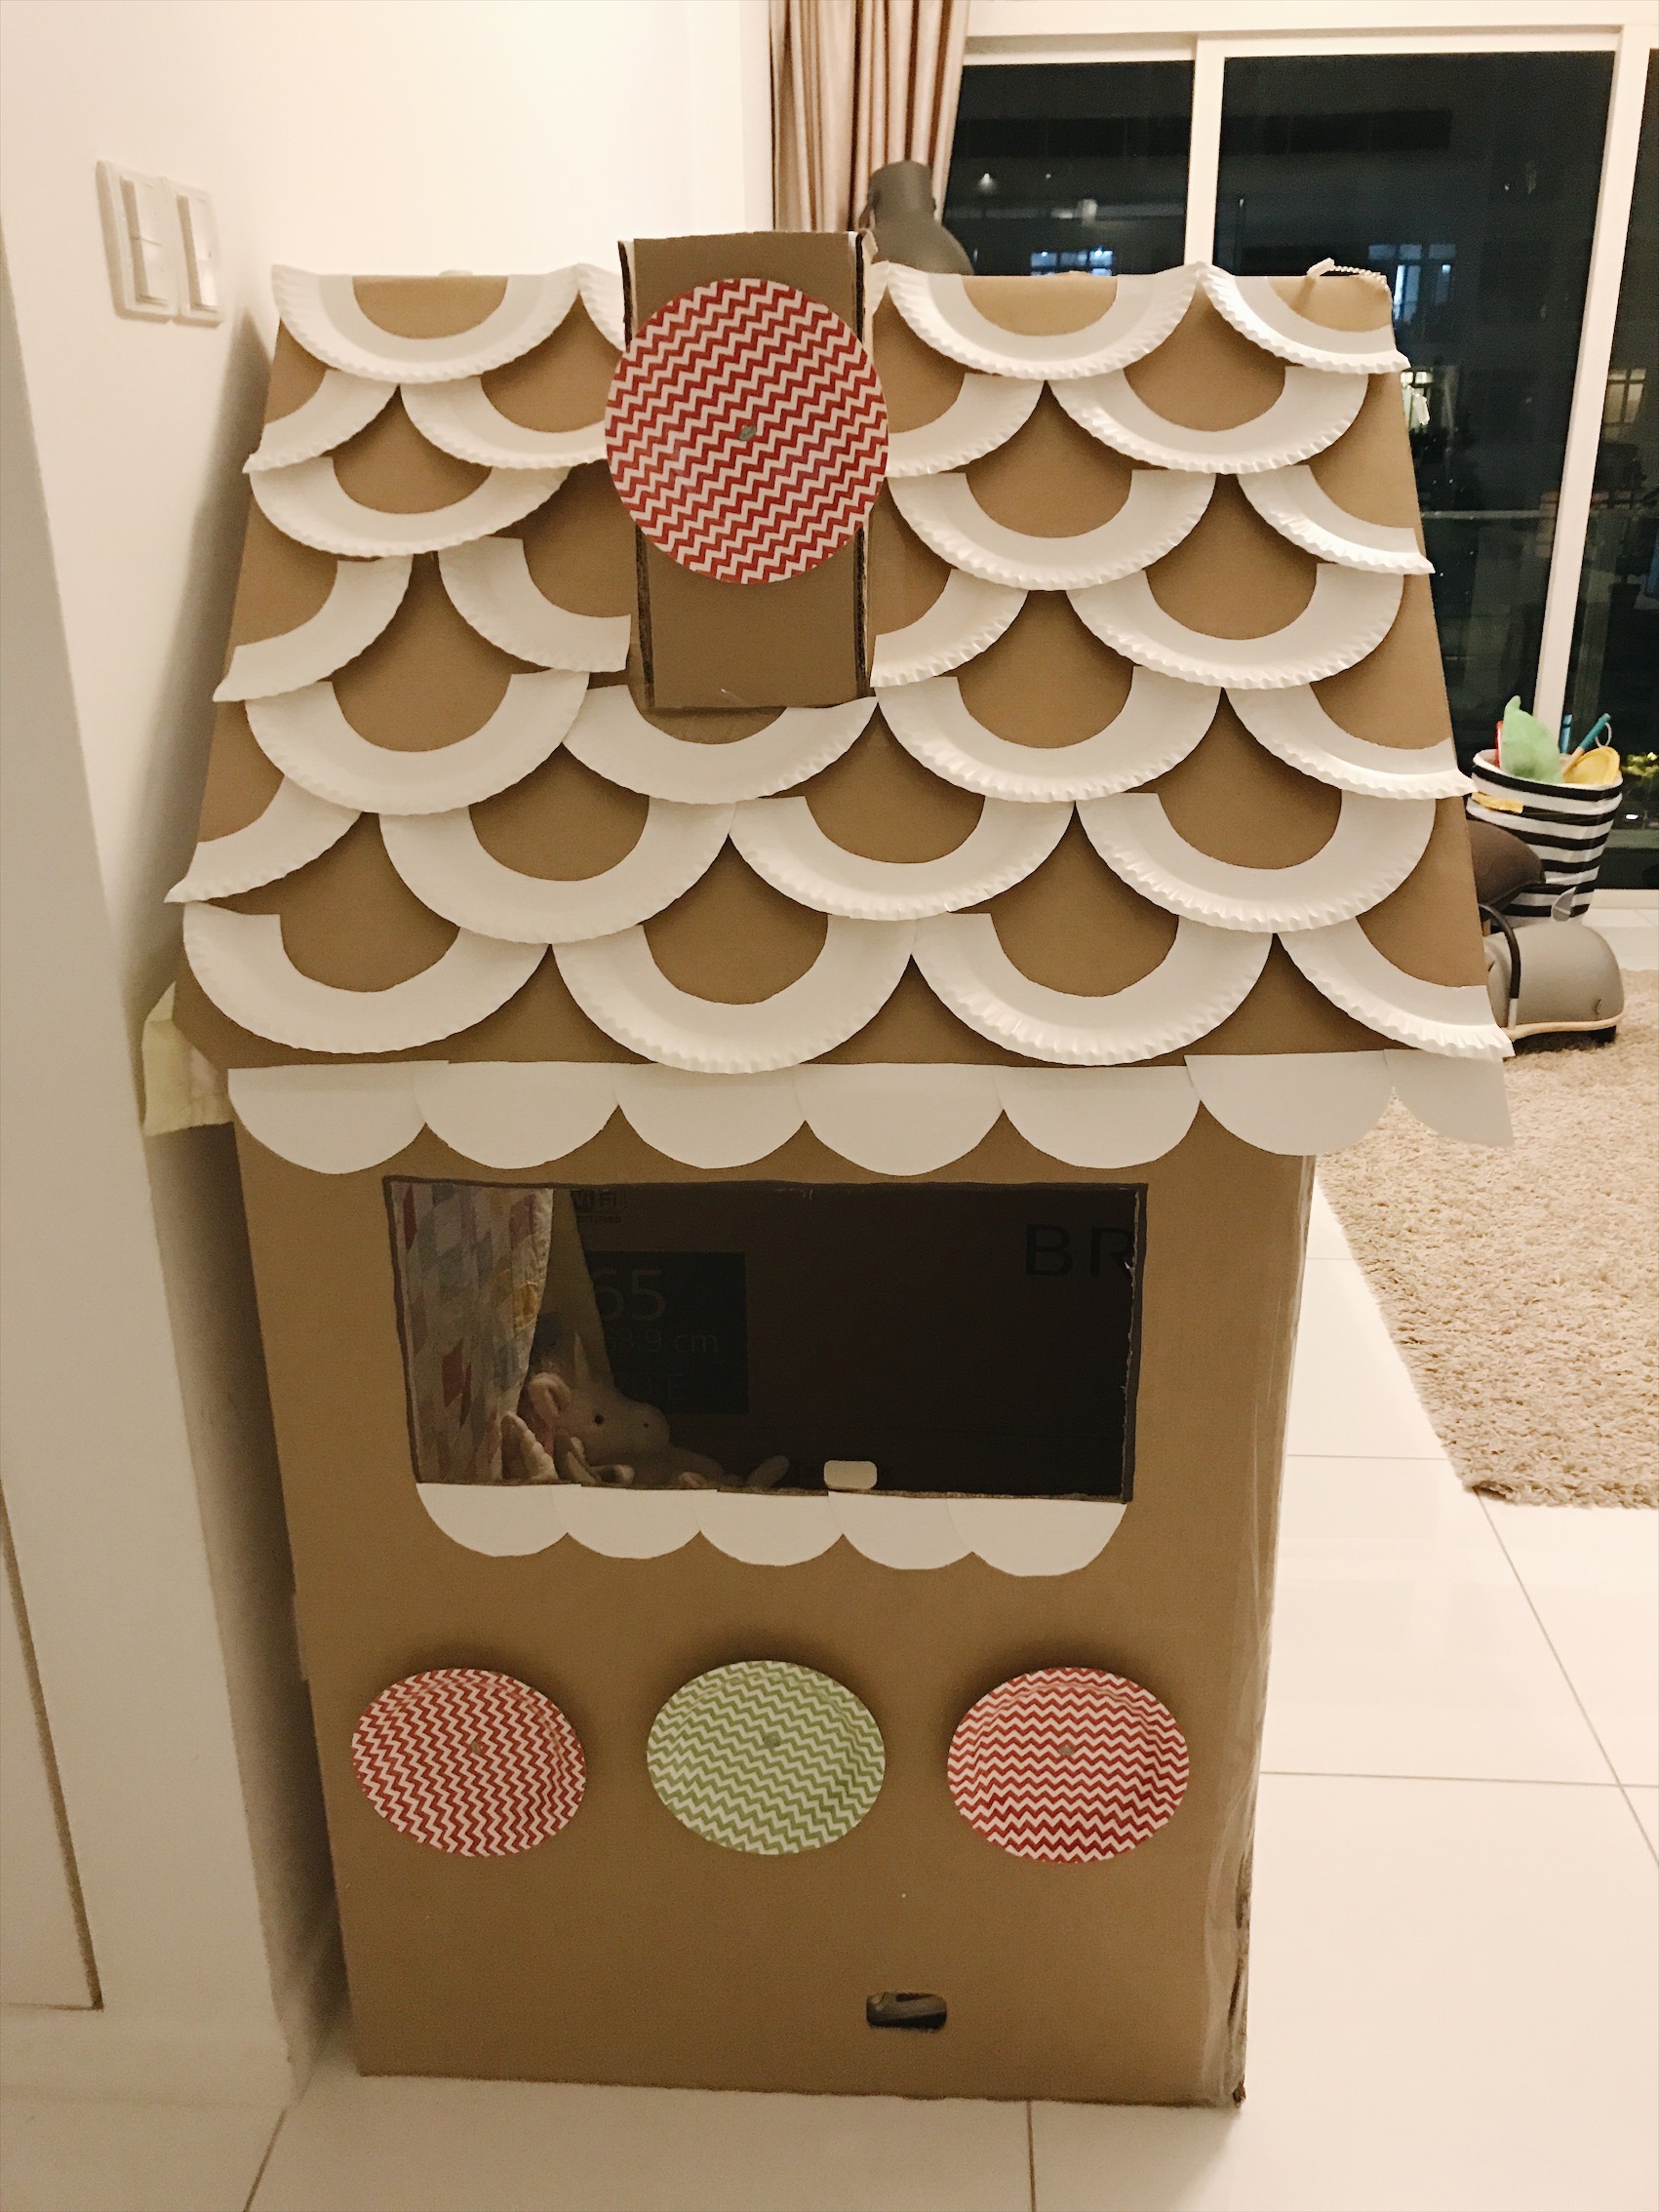
Happy December, folks! I've been wanting for while now to get the kids a little cardboard house or tent where they could play inside. It just so happened that we had a huge cardboard box from a recent purchase and so I decided to repurpose it for a DIY playhouse. Since it's the festive season, I thought a holiday themed house would be fun, so we decided to go with a cardboard gingerbread house. I'm super happy with how it turned out and the kids have really enjoyed it! Such a great way to reuse old cardboard to make something fun for the children.
Here's a rough guide as to how we did it.
- Base: We made the base of the house using the box itself (we had to reconfigure it somewhat since it was a rectangle and we wanted a square). Once the base was standing, we cut out a door (attached on one side so the kids could swing the door open and close), then cut out two side windows so you could see inside (the kids have used these windows as "shop windows" to serve food).
- Roof: The roof was the trickiest bit. We used a separate flat piece of cardboard, bent in half then placed on top of the base structure. To secure, I taped them together with A LOT of clear tape. To stop the roof from sliding and to take some weight off the tape, I used twine as "beams" to hold the sides of the roof for added support. To do this, I made a small hole in the roof on one side (higher up on the A frame), inserted a piece of twine (knotted on one end) and ran it out another small hole I made on the opposite side of the roof (with a dead-knot on the outside once it's through and pulled tight). The twine is supposed to keep the sides of the roof from sliding out, so make sure you make the knots big and the holes small (so they don't pull through the holes) and make the twine taut. I made these twine "beams" three more times along the depth of the roof.
- Chimney: We made the chimney from pieces cut out from another cardboard box. We taped the sides together to create a rectangular structure, then cut the base at the same angle as the roof. It was then secured with tape.
Once the structure was completed, I decorated the roof and windows with scallops and trim. I bought a pack of paper plates, cut them in half, then cut the inner semi-circle base out (leaving the scalloped edge). I used the plate edges for the roof, arranging them in a "shingle" pattern (you might need to cut some of the scallops in half to fit) and glued them on. Since the outside edges of the scallops aren't flush with the roof, it creates an interesting 3D effect which I really like. I then used the inner semi-circle of the plate (leftover from the scallops) and glued them onto the edges of the roof and the windows as a trim. I love how it turned out, especially because we utilised the whole paper plate and it was zero waste! I then glued some patterned plates I had leftover from a party onto the house and chimney to resemble peppermint candy. If you're up for it, you can get the kids to decorate regular paper plates to use as the candy decoration. Lastly I added some bunting I had and put in a few blankets, lovies and books for the kids and strung up some fairy lights for a cozy feel.
Overall, I'm really pleased with how it turned out! The kids have gotten quite a bit of play out of it and sometimes, I'll find them in there quietly looking at books or toys. It cost us $3 to make (we had to buy a pack of paper plates) - we had all the other materials in our home already. As for time, it took us about 3 hours in total, between building and decorating, It is not the sturdiest of playhouses, the kids have been a little rough with it at times and I've had to patch it on one or two occasions, but at the end of the day, I definitely think it was worth the work. Let me know if you decide to try it out, I'd love to see your playhouses!


